Google Docs How to Draw Line
It's useful to learn how to insert a line in Google Docs for several reasons. Horizontal lines are useful for dividing your document into different sections, especially if it's lengthy. They improve the layout of your text, making it more readable. For example, you can use horizontal lines to create an organized and neat-looking resume.
Note that adding a horizontal line in Google Docs is different from adding one in MS Word.
The main difference is that you can add a horizontal line using keyboard shortcuts in MS Word, but this option is not available in Google Docs. The closest alternative is underlining your text using the Control (or Command, for Mac users) + U option.
How to Insert a Horizontal Line in Google Docs
Google Docs gives you other options to quickly and easily insert a horizontal line in your document. In this article, we will be discussing three main methods of adding a horizontal line:
- Directly adding a line from the Insert tab
- Using shapes
- Using paragraph borders
Let's get started.
Method 1: Adding a horizontal line from the Insert tab
This is a direct method of adding the line in your document. The advantage of this method is that it's convenient, but the drawback is that you have limited options for formatting your line.
This method doesn't allow you to change the style (e.g. dotted or solid), color, and padding of your line. However, you can change the background color of your line (as we will see).
Hence, if you just want to add a simple line that is thin, solid and black, you can go for this method.
But if you'd like more options to customize your line, you can follow methods 2 and 3 instead.
With that being said, let's get to the steps of this method.
Step 1: Open your document.
First, open the document in which you want to insert the horizontal line. You can either open an existing document or create a new one by clicking on the plus symbol (which creates a blank document) or choose from one of the many templates.
Templates are especially useful if you're creating a resume.

Step 2: Click on the Insert tab.
The Insert tab is at the top left corner of your screen. It's the fourth one from the left, after the File, Edit and View tabs. Click on it.
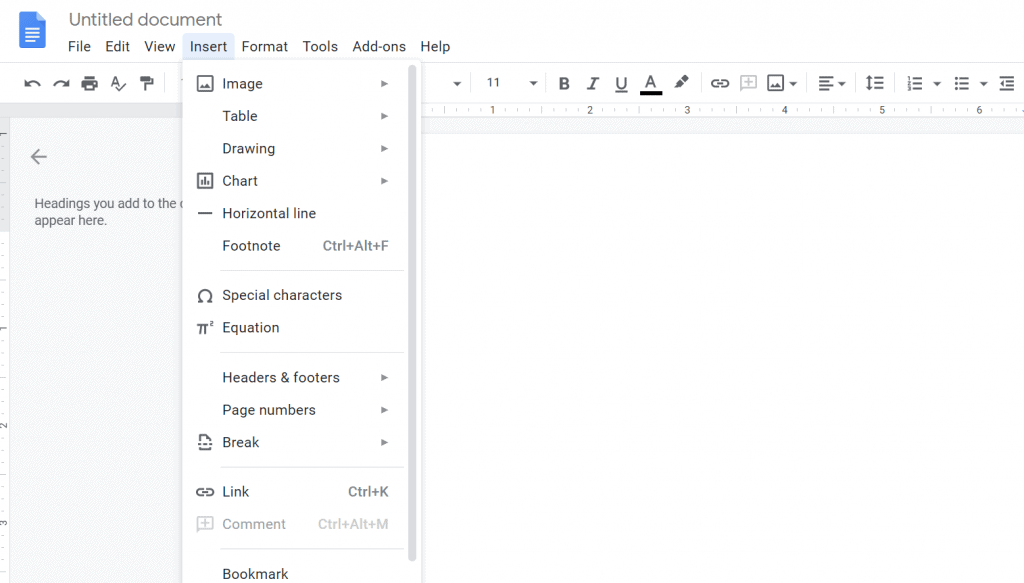
Step 3: Click on the Horizontal Line option.
This option is in the first section of the Insert menu. Click on it and a horizontal line will appear on your page below where your cursor is located.
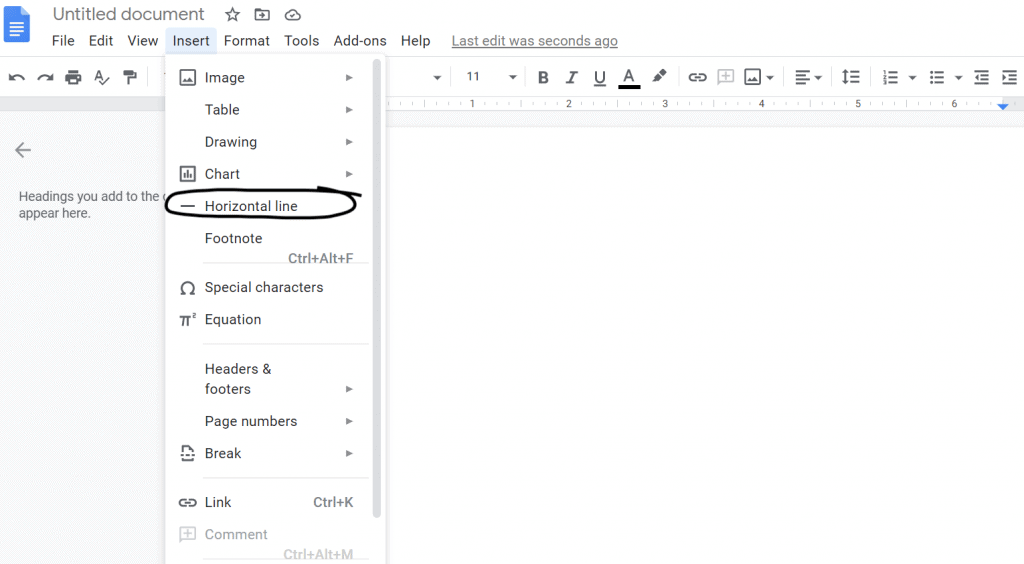
(Optional) Step 4: Format your line.
The only feature of your line that you can change under this method is its background color. You can do so by clicking on the Highlight color option on your toolbar.
A menu of colors will open; you can choose an existing option or create your own color by clicking on the Custom button.

Here's an example of a line with a yellow background colour:
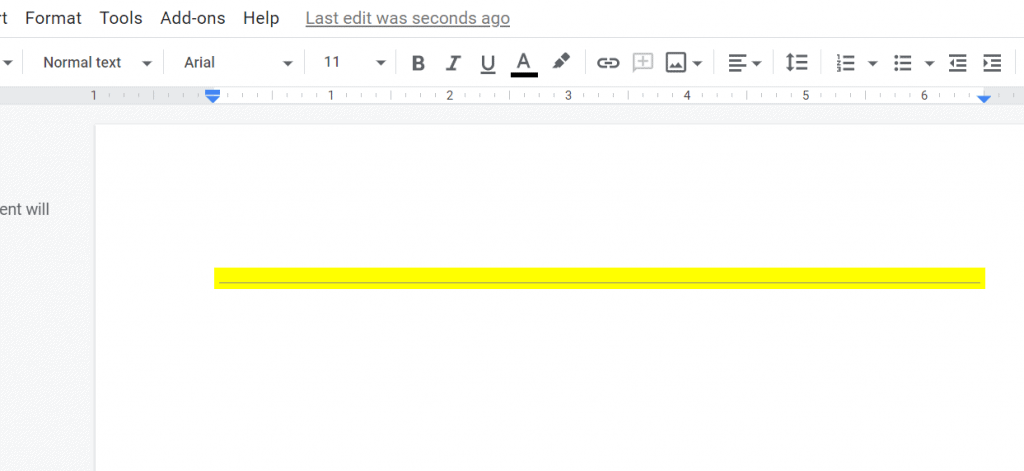
If you want to remove the background colour for your line, you can go back to the Highlight color menu and click on None.
Method 2: Using shapes
The second method of adding a horizontal line in your Google Docs is by using shapes. The benefit of this method is that it gives you more freedom for customization.
You can choose different types of lines (e.g. arrows) and change their colour, weight, style, and its start and end (e.g. by adding an arrow at the start or end of your line).
Step 1: Click on the Insert tab.
Click on the Insert tab which is located at the top left corner of your screen. This will open up the Insert menu.
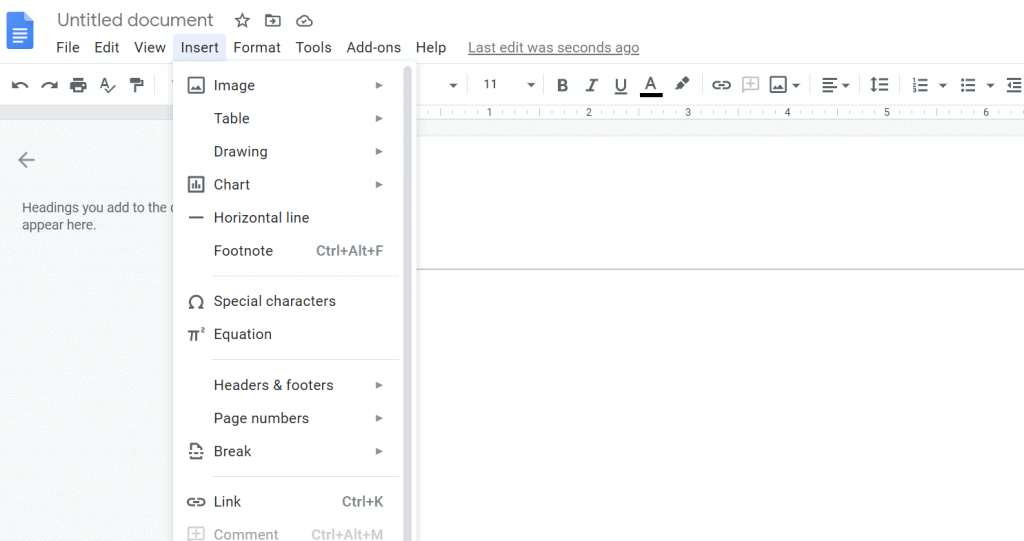
Step 2: Click on the Drawing option.
This is the third option in the Insert menu. By clicking on the Drawing option, you will see another menu of 2 options: New and From Drive.
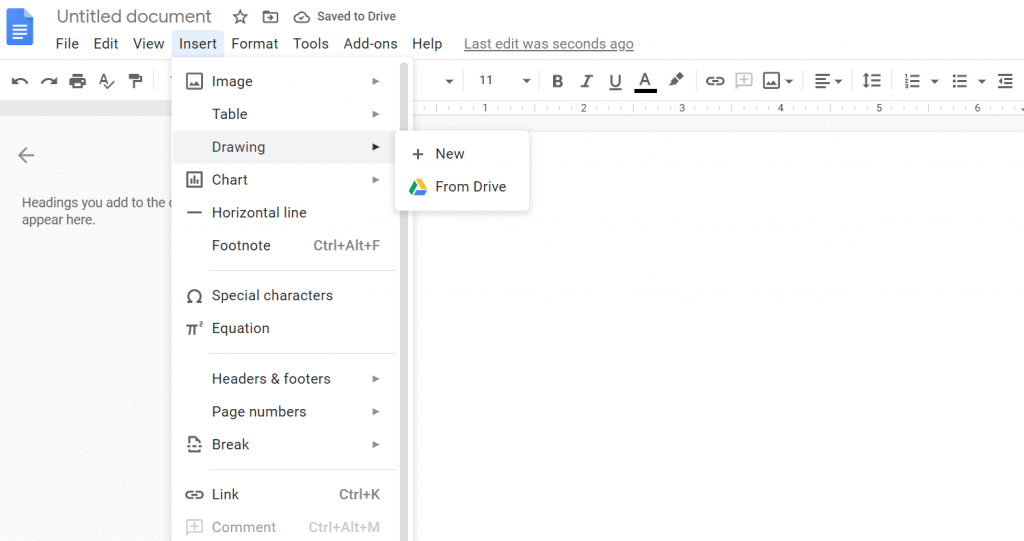
Step 3: Click on the New option.
You can click on the From Drive option if you already have a horizontal line template saved in your Google Drive. If you don't, click on the New option instead. This should open up a new window where you can draw your line.

Step 4: Draw a line of your choice.
You can find all your drawing options in the toolbar at the top of your window. Click on the small arrow next to the line icon to see all the options available.
Pick a line type and start drawing on the screen. To make sure that it is perfectly horizontal, press the Shift button as you're drawing.
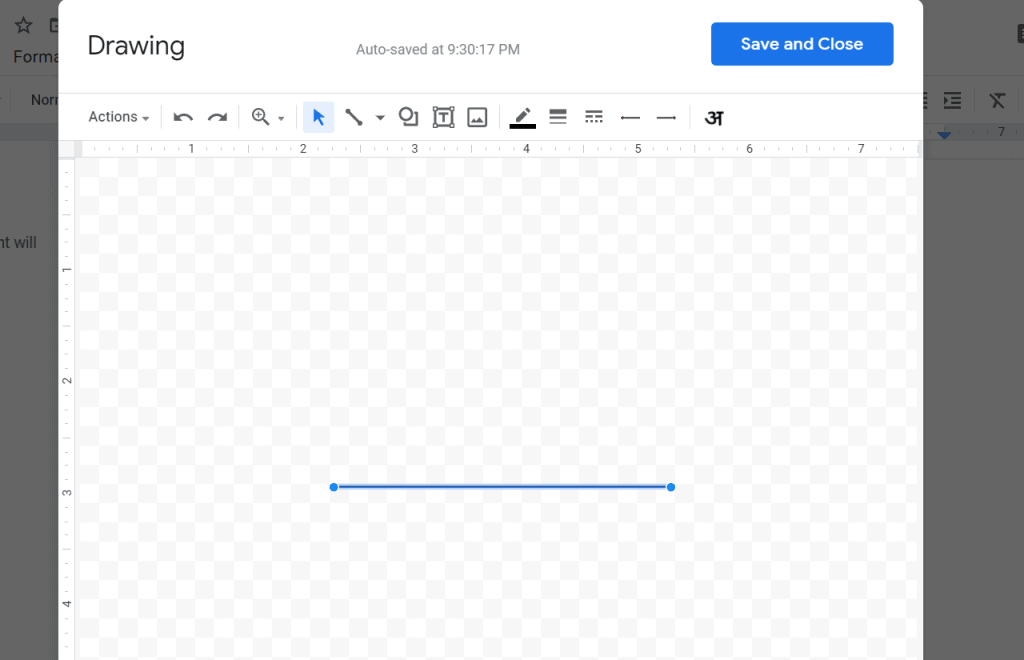
Step 5: Format your line.
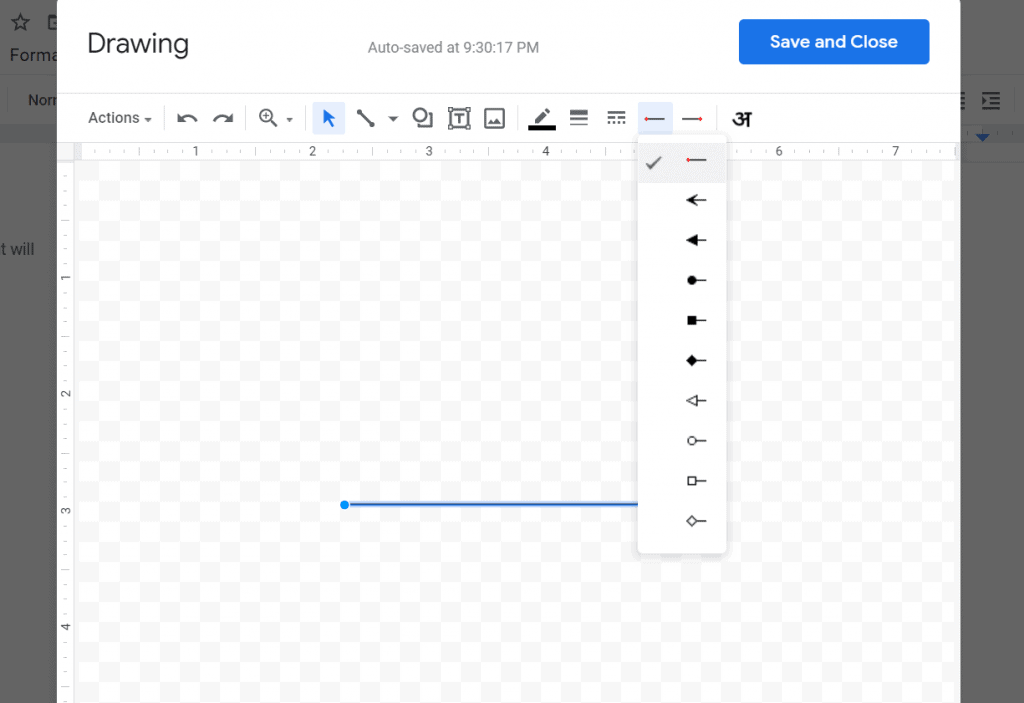
Click on your line to find all the options available for formatting it. You should find the following five options for editing your line:
- Line colour
- Line weight (you can make your line thinner or thicker)
- Line dash (you can make your line dotted, dashed, etc.)

- Line start and Line end (you can add an arrow, square, etc. at the corners of your line)
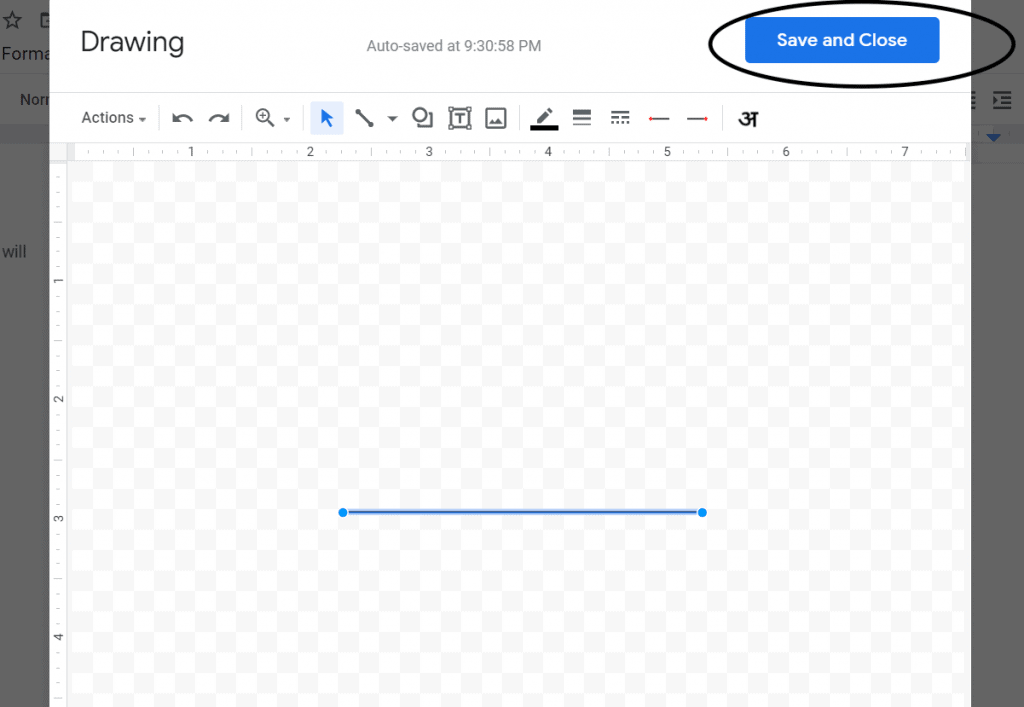
Step 6: Click on Save and Close.
Once you've formatted your line the way you like and are ready to insert it in your document, you can click on the Save and Close button at the top right corner of the screen.
You can find a horizontal line where your cursor is.
Method 3: Adding paragraph borders
The last method of inserting horizontal lines that we'll be discussing today is using paragraph borders.
As the name suggests, paragraph borders are used for adding borders around your paragraphs. To insert a horizontal line, you can choose the top, bottom or between options.
Here are the steps for adding your ideal border.
Step 1: Click on the Format tab.
The Format tab is right next to the Insert tab. Click on it.
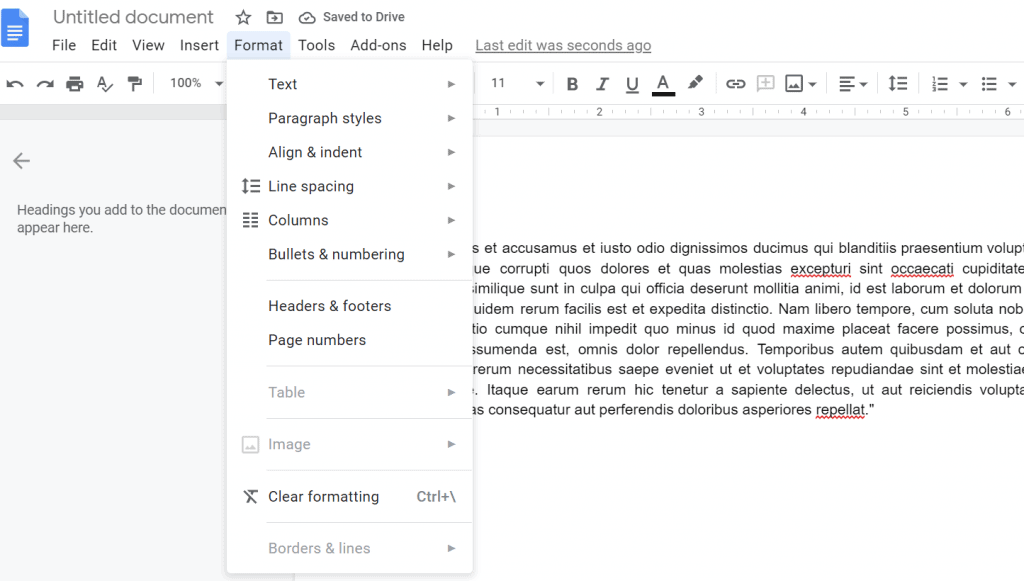
Step 2: Click on the Paragraph styles option.
This is the second option is the Format menu. Clicking on it should open up another menu.
Step 3: Select the Borders and shading option.
This is the very first option in the Paragraph styles menu. Click on it to open up the Borders and shading window.
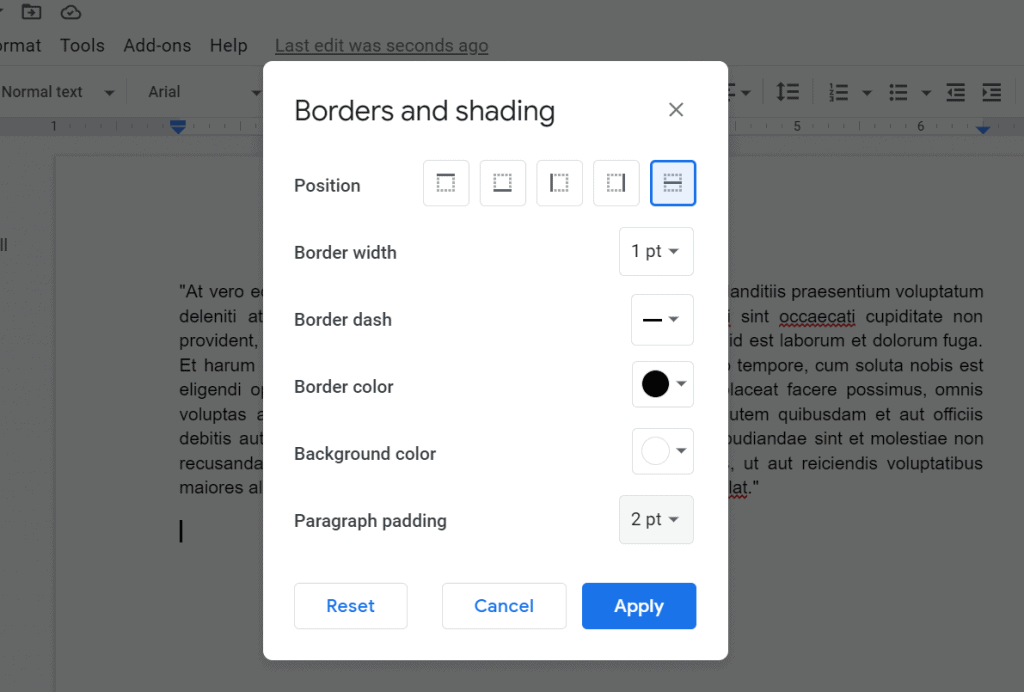
Step 4: Select your border position.
You have five options for the position of your border: top, bottom, left, right and between.
To insert a horizontal line, choose either the top, bottom or between options. The between option puts your paragraph between horizontal borders, so it will have both a top and a bottom border. This is what will happen when you select this option:
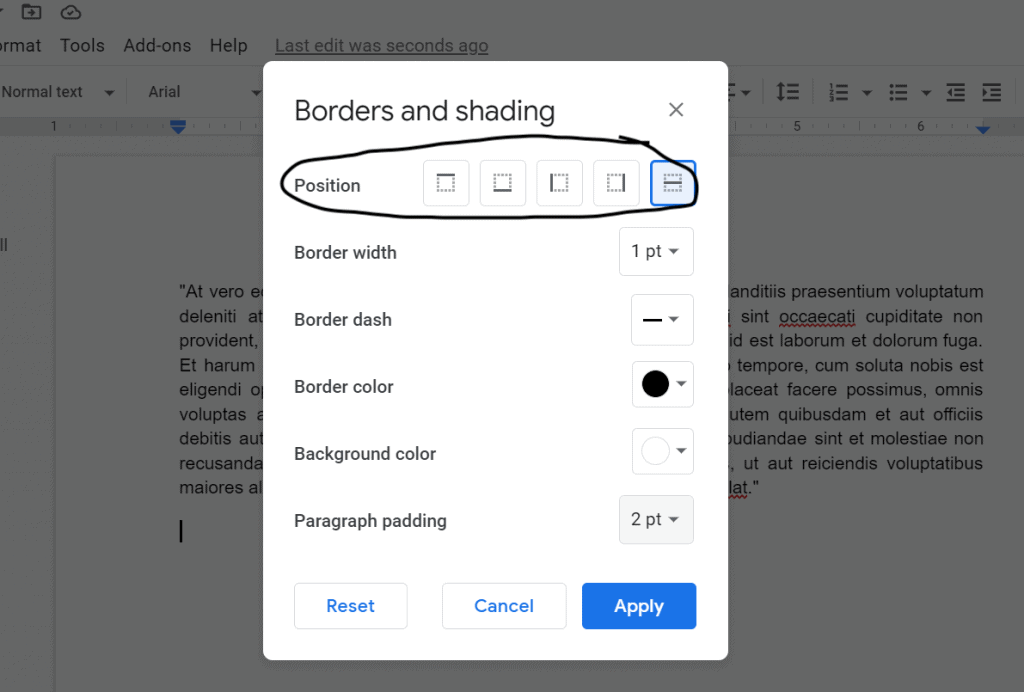
Step 5: Format your border.
You can customize these border features:
- Border width
- Border dash
- Border colour
- Background colour
- Paragraph padding (this option allows you to change the spacing around your paragraph)
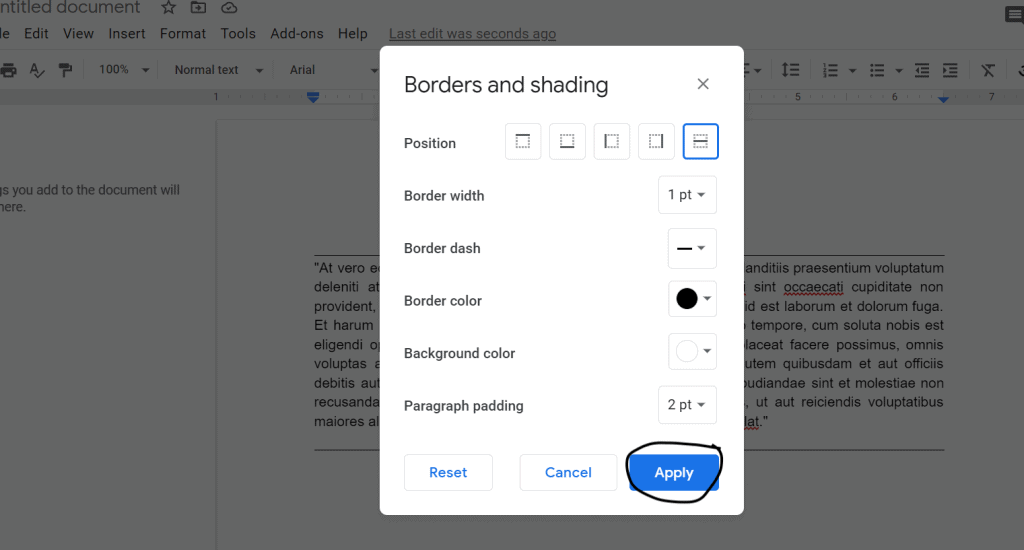
Step 6: Click on Apply.
When you're satisfied with your border, you can click on the Apply button to insert it in your page.
Removing your line
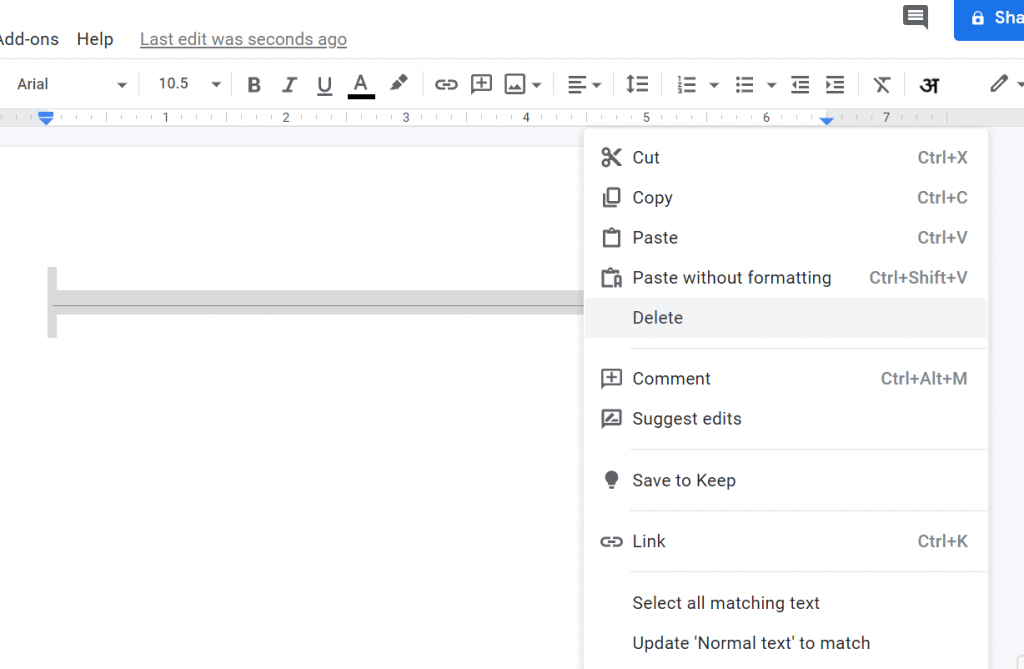
You can simply highlight your line and press the Backspace key to remove it. You can also place your cursor at the end of the line and press Backspace. A lengthier way of removing your line is by highlighting it, right-clicking and selecting the Delete option.
Conclusion
This is all you have to know about inserting a horizontal line in your Google Docs! Depending on the context, you can apply one of the three methods you've learned.
We also have a tutorial which teaches you how to insert a vertical line in google docs.
Source: https://officebeginner.com/gdocs/how-to-insert-a-horizontal-line-in-google-docs/
0 Response to "Google Docs How to Draw Line"
Post a Comment